My review may not be as polished or as perfect as others found on the interwebs, but I'm mainly commenting on what I find interesting and useful, which in turn makes these reviews far easier to write!
This app was created to allow users to make and publish posters, invitations and other related material. Through the use of templates, one can create some very eye-catching images that probably look more professional than they actually are. I'll go through the steps of using this app and hopefully, anyone who is contemplating whether or not to get this app will then positively decide to go for it!
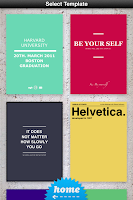.png) First things first, select 'create new' to open a new project. You'll then be faced with the mammoth task of choosing a template for your project. There are currently 82 different templates to chose from, all with slightly different layouts, fonts, colours, themes, etc. To begin with, I would advise you simply pick any of them, just to get a hang of the user interface and controls. After that, you need to pick them really due to the fonts used. I will go into that later.
First things first, select 'create new' to open a new project. You'll then be faced with the mammoth task of choosing a template for your project. There are currently 82 different templates to chose from, all with slightly different layouts, fonts, colours, themes, etc. To begin with, I would advise you simply pick any of them, just to get a hang of the user interface and controls. After that, you need to pick them really due to the fonts used. I will go into that later.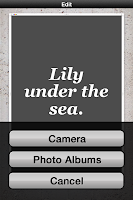.png)
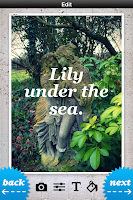 Once you've chosen your template, it will ask you to insert an image either using your camera or one previously taken. Hopefully these screens shots (left and right) will work with the text - like I said, I'm no professional reviewer by any stretch of the imagination! OK then, to the right, you'll see the photo that I've added in the background. You can use the finger-pinch technique to make the photo larger, smaller, etc.
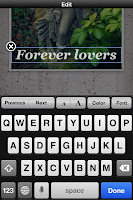
 The 4 buttons at the bottom are used for the following: Change the photo (Camera icon). Editing the contrast, brightness and saturation of the photo (3 slider icon). Edit the text (T icon) and change the text colours (paint icon). Assuming that you're happy with the picture, leave these buttons alone and concentrate on the poster itself. Tap on the text and your keyboard pops up (see left image). Here you can change the text, the font size, the font colour and the font itself. You can also delete lines using the little 'x' as well. Once happy with the text, click Done. You can then tap + hold the text you want to move - here ----->
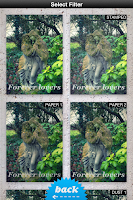
Once you're done with the editing, you can now click next. Your poster will then go into its final stage whereby you can chose what type of finish you want. Anything from normal (no edit) to vignetting, poster fold marks and various dots and patterns can be added here. Then, simply save it to your camera roll, email it, twitter, facebook or instagram it! It really couldnt be any simpler! I've used this app greatly now, most of the results you can see on my photo blog (link below).
It really is fun and simple to use. The fact that you have to pay for it just means that the updates via the app store give you more than you would usually get from free apps. I've only had the app a little while now, and the first update added more templates which is always nice to see. One issue I have with Phoster is that not all images within the templates are movable. Lines and other images will not move and you cannot delete them either as you can with text. In fact, it is only text that you can alter....Hopefully this will change with an update.
My overall verdict is that I simply love this app. It is very classy and simple to use. The controls are not cluttered and templates are diverse enough to give everyone something that they may use. I would have given this app a 9/10, but the fact you cant change certain parts of some templates is still an issue. Hopefully they will change this! I do still strongly recommend you get this app if you are into editing and having fun with photos. For now at least...it gets a very worthy:
8/10
R O M E O


.JPG)
.jpeg)
.jpeg)
